

1 - Installing the basic requirements
To connect your computer to the radio, you will need the butt,
shorthand for "Broadcast Using This tool".
The software is free and can be found here:

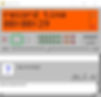
this is butt !
If your computer is older, or the installation doesn't work, install slightly older versions that will roll. Always download the .EXE file

2 - Configuring the butt
Connecting to the server
After installing the program, an icon with a speaker should appear on your desktop. Open it .
First let's connect the butt to the radio server, it's very simple:
- Click on settings .
- In the " main " tab you will find the Server field.
Click on ADD to add the radio server.
- A new " Edit Server " window will open.
In it you enter the information provided by a
radio administrator to be able to connect.

The data in the "edit server" window is for illustrative purposes only.
Configuring the audio
Now let’s choose where the audio you’re going to stream comes from.
In the " Audio " tab , in the " Audio Device " field, select your sound card.


If you plan to use external hardware:
- Select your external sound card.
- If you don't have an external sound card, connect the mixer / table exiting the master with a p2 cable to your computer's microphone input , and in " Audio Device " on the butt select your microphone.
If you plan to use your internal sound card, and software such as virtual DJ, Ableton or Traktor:
- Right-click the sound icon on your taskbar, and click " Sounds "

- Navigate to the " Recording " tab
- Right-click on devices and select " Show Disabled Devices "
- Now your sound card should appear in the list.
Right click on the internal sound card and select "enable ".

- Returning to Butt, in the "audio" tab, in the " Audio Device " field choose the " Microsoft Sound Mapper "


Ready!
At this point, if you click the " play " button on the main butt tab, next to the limiter, your broadcast will start playing on the radio.

3 - Naming and recording your program
Before going live, it is important to certify a few things:
- if you don't name your program, the website's player will have "UNKOWN" written on it.
- if you record your program, we can replay it and you will become more famous.
So let's name and record your show!
Naming your program:

- Navigate to the "stream" tab, and in "Update song name manually" write the name and edition of your program.
Recording your program:


- Navigate to the "Record" tab, enter a name for your recording file and choose the directory where it will be located.
By default it chooses the Windows Music folder.
tip: select the "Start recording when connected" box to record whenever you press the play button and start the transmission.
4 - Entering live
If everything you've done has worked so far, it's time to get started!
Press PLAY, start playing and tune in to the radio.
When finished, press the "Stop" button.


Tip:
When you are finished with the program, press STOP twice.
If you press it only once it will continue recording.